This isn’t just a breakdown of the equipment I use, but a helpful guide for anyone new, or looking for advice, and equipment for the outdoors. In particular, hiking, running, wild camping and equipment/clothing for taking your family out to enjoy the outdoors, whatever the time of year.
Before each section, there are handy tips, tricks, and reasons to use such items of clothing and equipment. Although many of the items are related to brands I use, the logic can be applied to any brand or item on the market. Should you want further help or advice, please feel free to contact me.
As soon as I was old enough, I joined Beavers in the Scout Association, and since then, I have always been involved with the outdoors to some degree. Twenty years on, nothing has changed, and I have been involved with the Scout Association, Duke of Edinburgh Award, John Muir Awards, Outdoors Journalist, and now with Mountain Rescue England and Wales.
It’s worth highlighting that equipment is a very personal thing. What works for me won’t work for you, and vice versa, but sharing our experiences helps influence us to craft our kit lists.
Where do you start with the equipment needed for camping and hiking in the hills and mountains of the UK?
Before setting off, it's useful to write down what you need for the days ahead. This will help prevent any unnecessary kit falling into your rucksack (we've all heard the saying, packing everything but the kitchen sink!). Feel free to copy and paste the below and create your own tick list for your adventures.
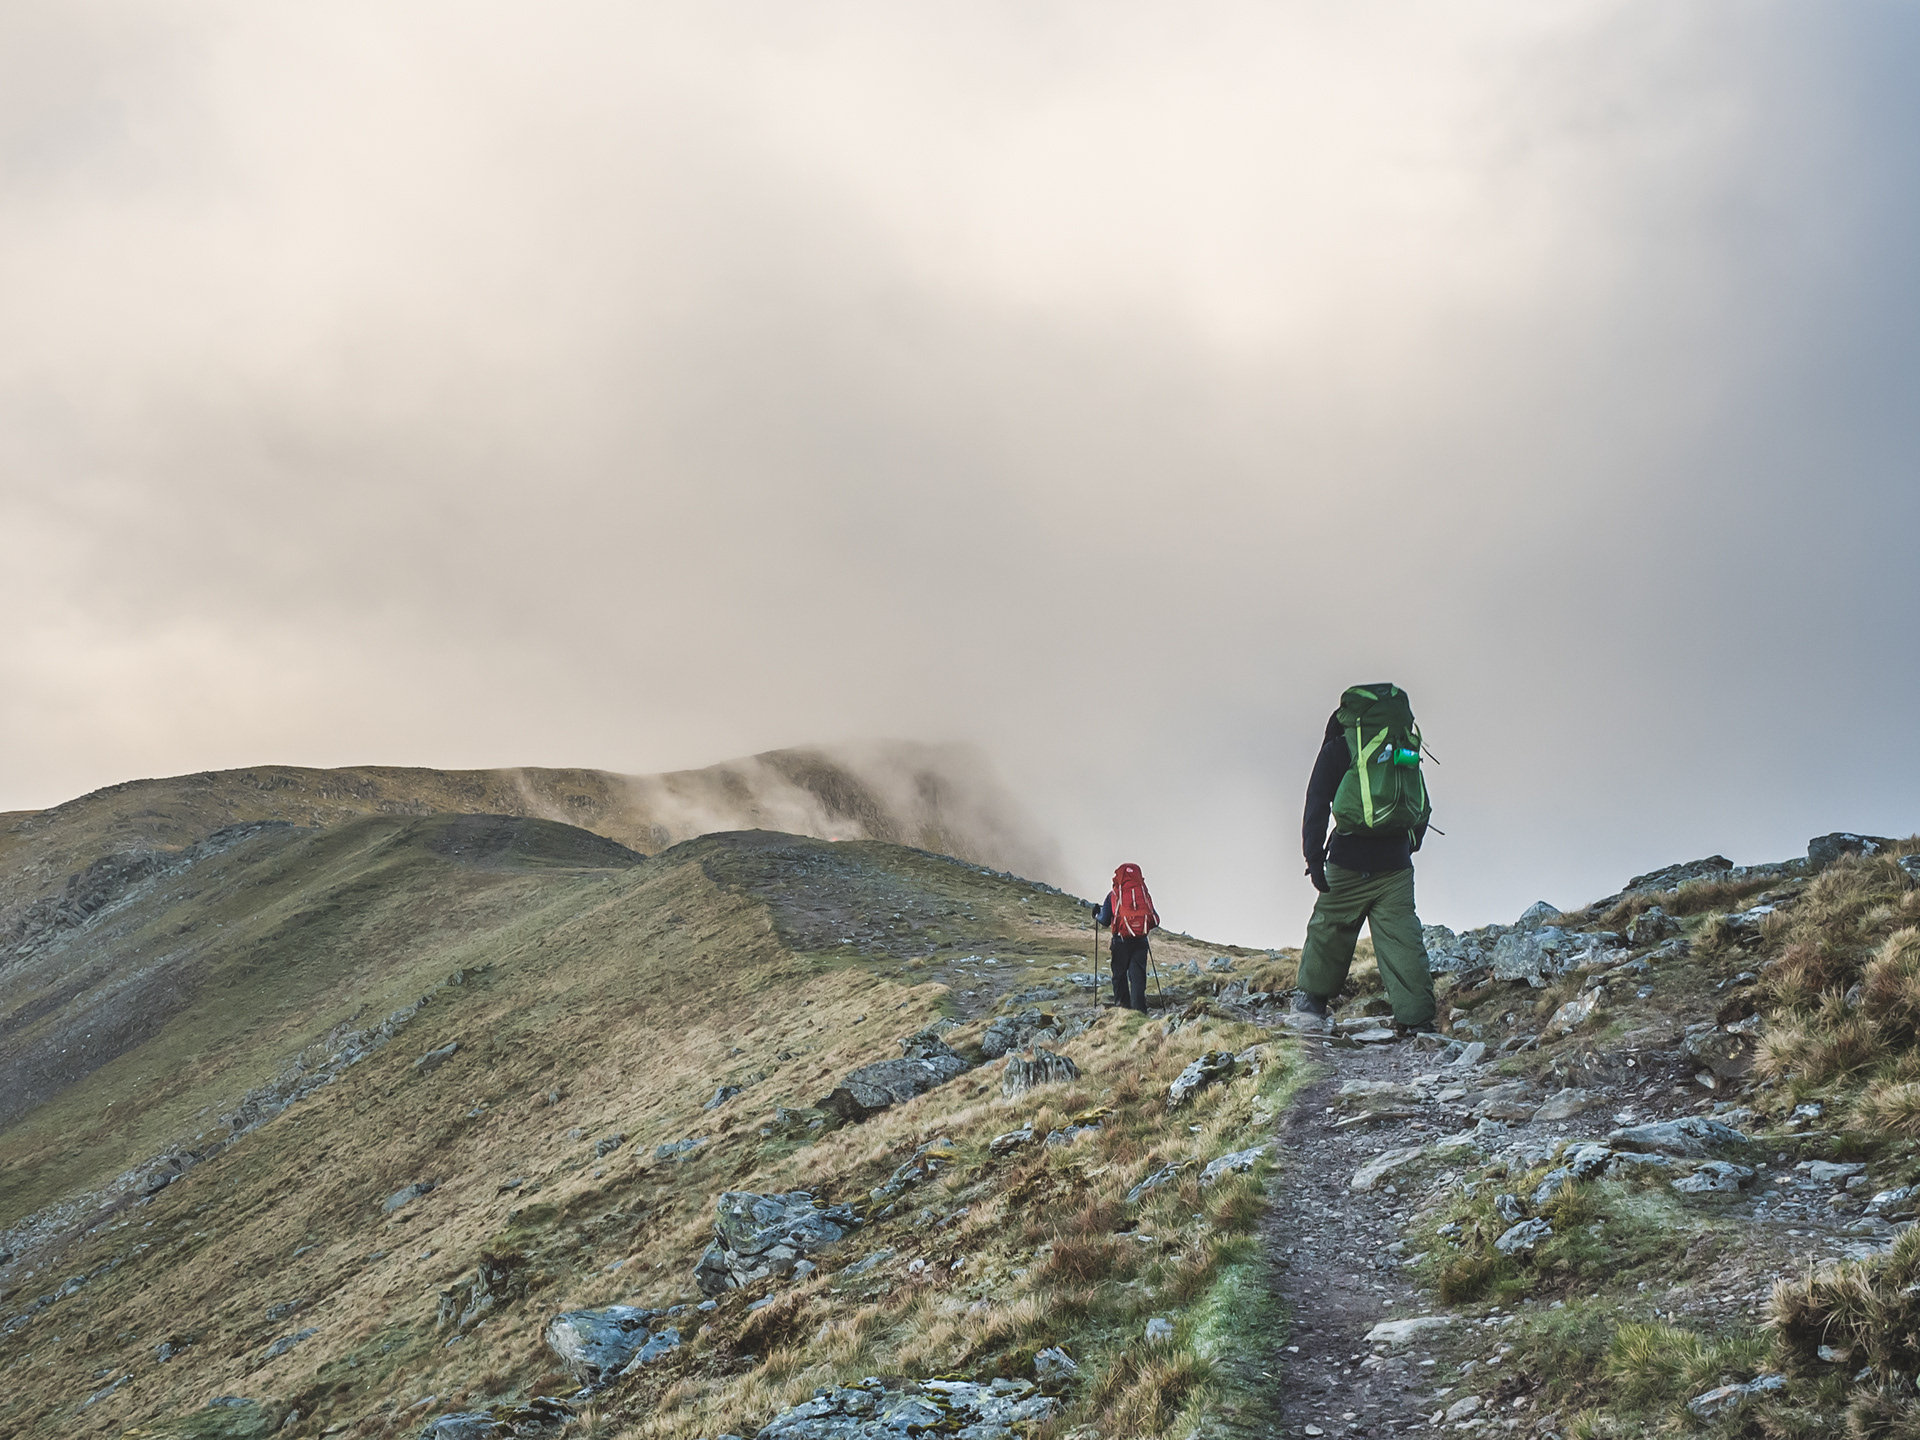
Another helpful aid for your kit list and the weight of that pack is using Lighterpack.com. My list includes EVERYTHING from clothing, tents, sleeping and spare kit. But I may not pack all of this at the same time. My base weight for most of the year is around 7kg. In winter, it's heavier with extra clothing and waterproofs. My kit now includes, as standard, some of the Search and Rescue equipment I need and use for a member of Mountain Rescue England and Wales. So, the two are integrated into one pack, so no matter where I am, I can hit the hill for leisure or for Rescue requirements.
Expedition Kit:
Rucksack (day hike up to 35 litre / multi-day expedition 50-70 litre)
Waterproof liner (dry bags)
Waterproof jacket
Waterproof trousers
Maps, GPS and Compass
Torch plus spare and batteries
Powerbank and charging cables
First-aid kit with Blister plasters
Whistle
Survival bag
Walking boots
Gaiters (If boggy and wet underfoot)
Water (2 litres minimum)
Lunch, plus spare food for emergency use
Hat and gloves, plus spares
Spare clothing, which includes base layer, socks, underwear, and fleece
Sunglasses, sun cream and sun hat
Bug spray plus head net (net optional)
Flask (Cold weather)
Watch
Small amount of money
Personal Kit:
Sleeping bag (3-season minimum)
Sleeping bag liner (optional)
Insulation mat (sleeping mat R-Value of 3+ minimum)
Spoon, knife, fork (spork - metal only to avoid breaking)
Bowl, mug and plate
Brew kit (hot drinks - tea, coffee, hot choc etc)
Food
Clothes (2 days = 3 shirts, two trousers, 3 underwear, 1 jumper / +1 for each day is generally a good guide)
Spare socks
Wash kit and toiletries (keep to minimal: tooth brush + paste, roll on deodorant)
Biodegradable toilet paper and trowel.
Tent
Stove and pans
Fuel (meth or gas)
Lighter, matches and spares
Spare map and compass
Penknife, Duct tape, laces, string
Mobile phone
Power bank
Spare warm clothes
Camera, pen, paper, etc
Outdoors equipment for camping and hiking
Rucksacks for hiking and camping
This is possibly the biggest challenge when it comes to the outdoors. There are so many options with the overall look, styles, features, size and comfort levels. It can be overwhelming when you first begin your search.
The first thing you need to ask yourself is what you hope to achieve with your rucksack. Is it hiking, photography, paddleboarding and sailing, or evening rock climbing and caving? Each will have a style and numerous features to help. Mine are for use with hiking, travel, search and rescue and trail running.
I have two different packs. One for multi-day trips (a 50-75 litre) and for my Mountain Rescue needs, and another for day hikes and trail running (20l). This suits me well, and I know what I need is in either pack. However, the sweet spot is usually 30-50 litres for most people's needs, and if you’re unsure about what kit you need, then I suggest bigger is better. This way, you can squash down any excess space. What you can’t do is magic up more space.
Here are some of my personal favourites I’ve used in the past, which have been really good and used for all sorts of Duke of Edinburgh expeditions to general day hikes and wild camping in the mountains. Vango Sherpa 70, Lowe Alpine AirZone Pro 40-50L, Osprey Archeon 70L, and Osprey Talon 55L.
Here is where things get really frustrating. One bag doesn’t fit all the needs. A 70L rucksack isn’t going to be great as an everyday bag. That would be a lot of wasted space and effort, so I use a variety of bags for different requirements and times of the year.
My go-to everyday rucksack is my Mountain Equipment Tupilak 20L running/hiking vest. At 20l and only 500 grams its lightweight and fits all I need for a day out on Dartmoor, exploring the mountains and the occasional ultra lightweight single night out in a bivvi bag.
My larger hiking rucksack, which is primarily used for multi-day trips and for Mountain Rescue needs, is my Mountain Equipment Tupilak 50-75L. At 1kg and expandable. It's lightweight and tough for carrying heavy kit for multiple days. The majority of its time, it's in the 50L configuration and strapped down. But the additional 25 litres is useful for wet kit, rescue equipment or bulker items in winter.
Drybags
Not all bags are weatherproof or come with waterproof covers, so your rucksacks should be lined with drybags to further protect your kit inside. They are cheap, lightweight and in all Duke of Edinburgh, Scout expeditions and even Ten Tors Challenge, which I have previously worked with, we won’t allow groups to go out without them. They also help divide your rucksack into dry or wet. For example, if you have a wet tent and dry warm clothes inside. You wouldn’t want them both in the same section. Dry bags help divide this up and prevent the wet from wrecking the warm/dry kit.
Mountain Equipment Tupilak 50-75L = 1040g
Mountain Equipment Tupilak 20L = 510g
Mountain Equipment waterproof dry bags (various sizes 3L - 50L) = 90g
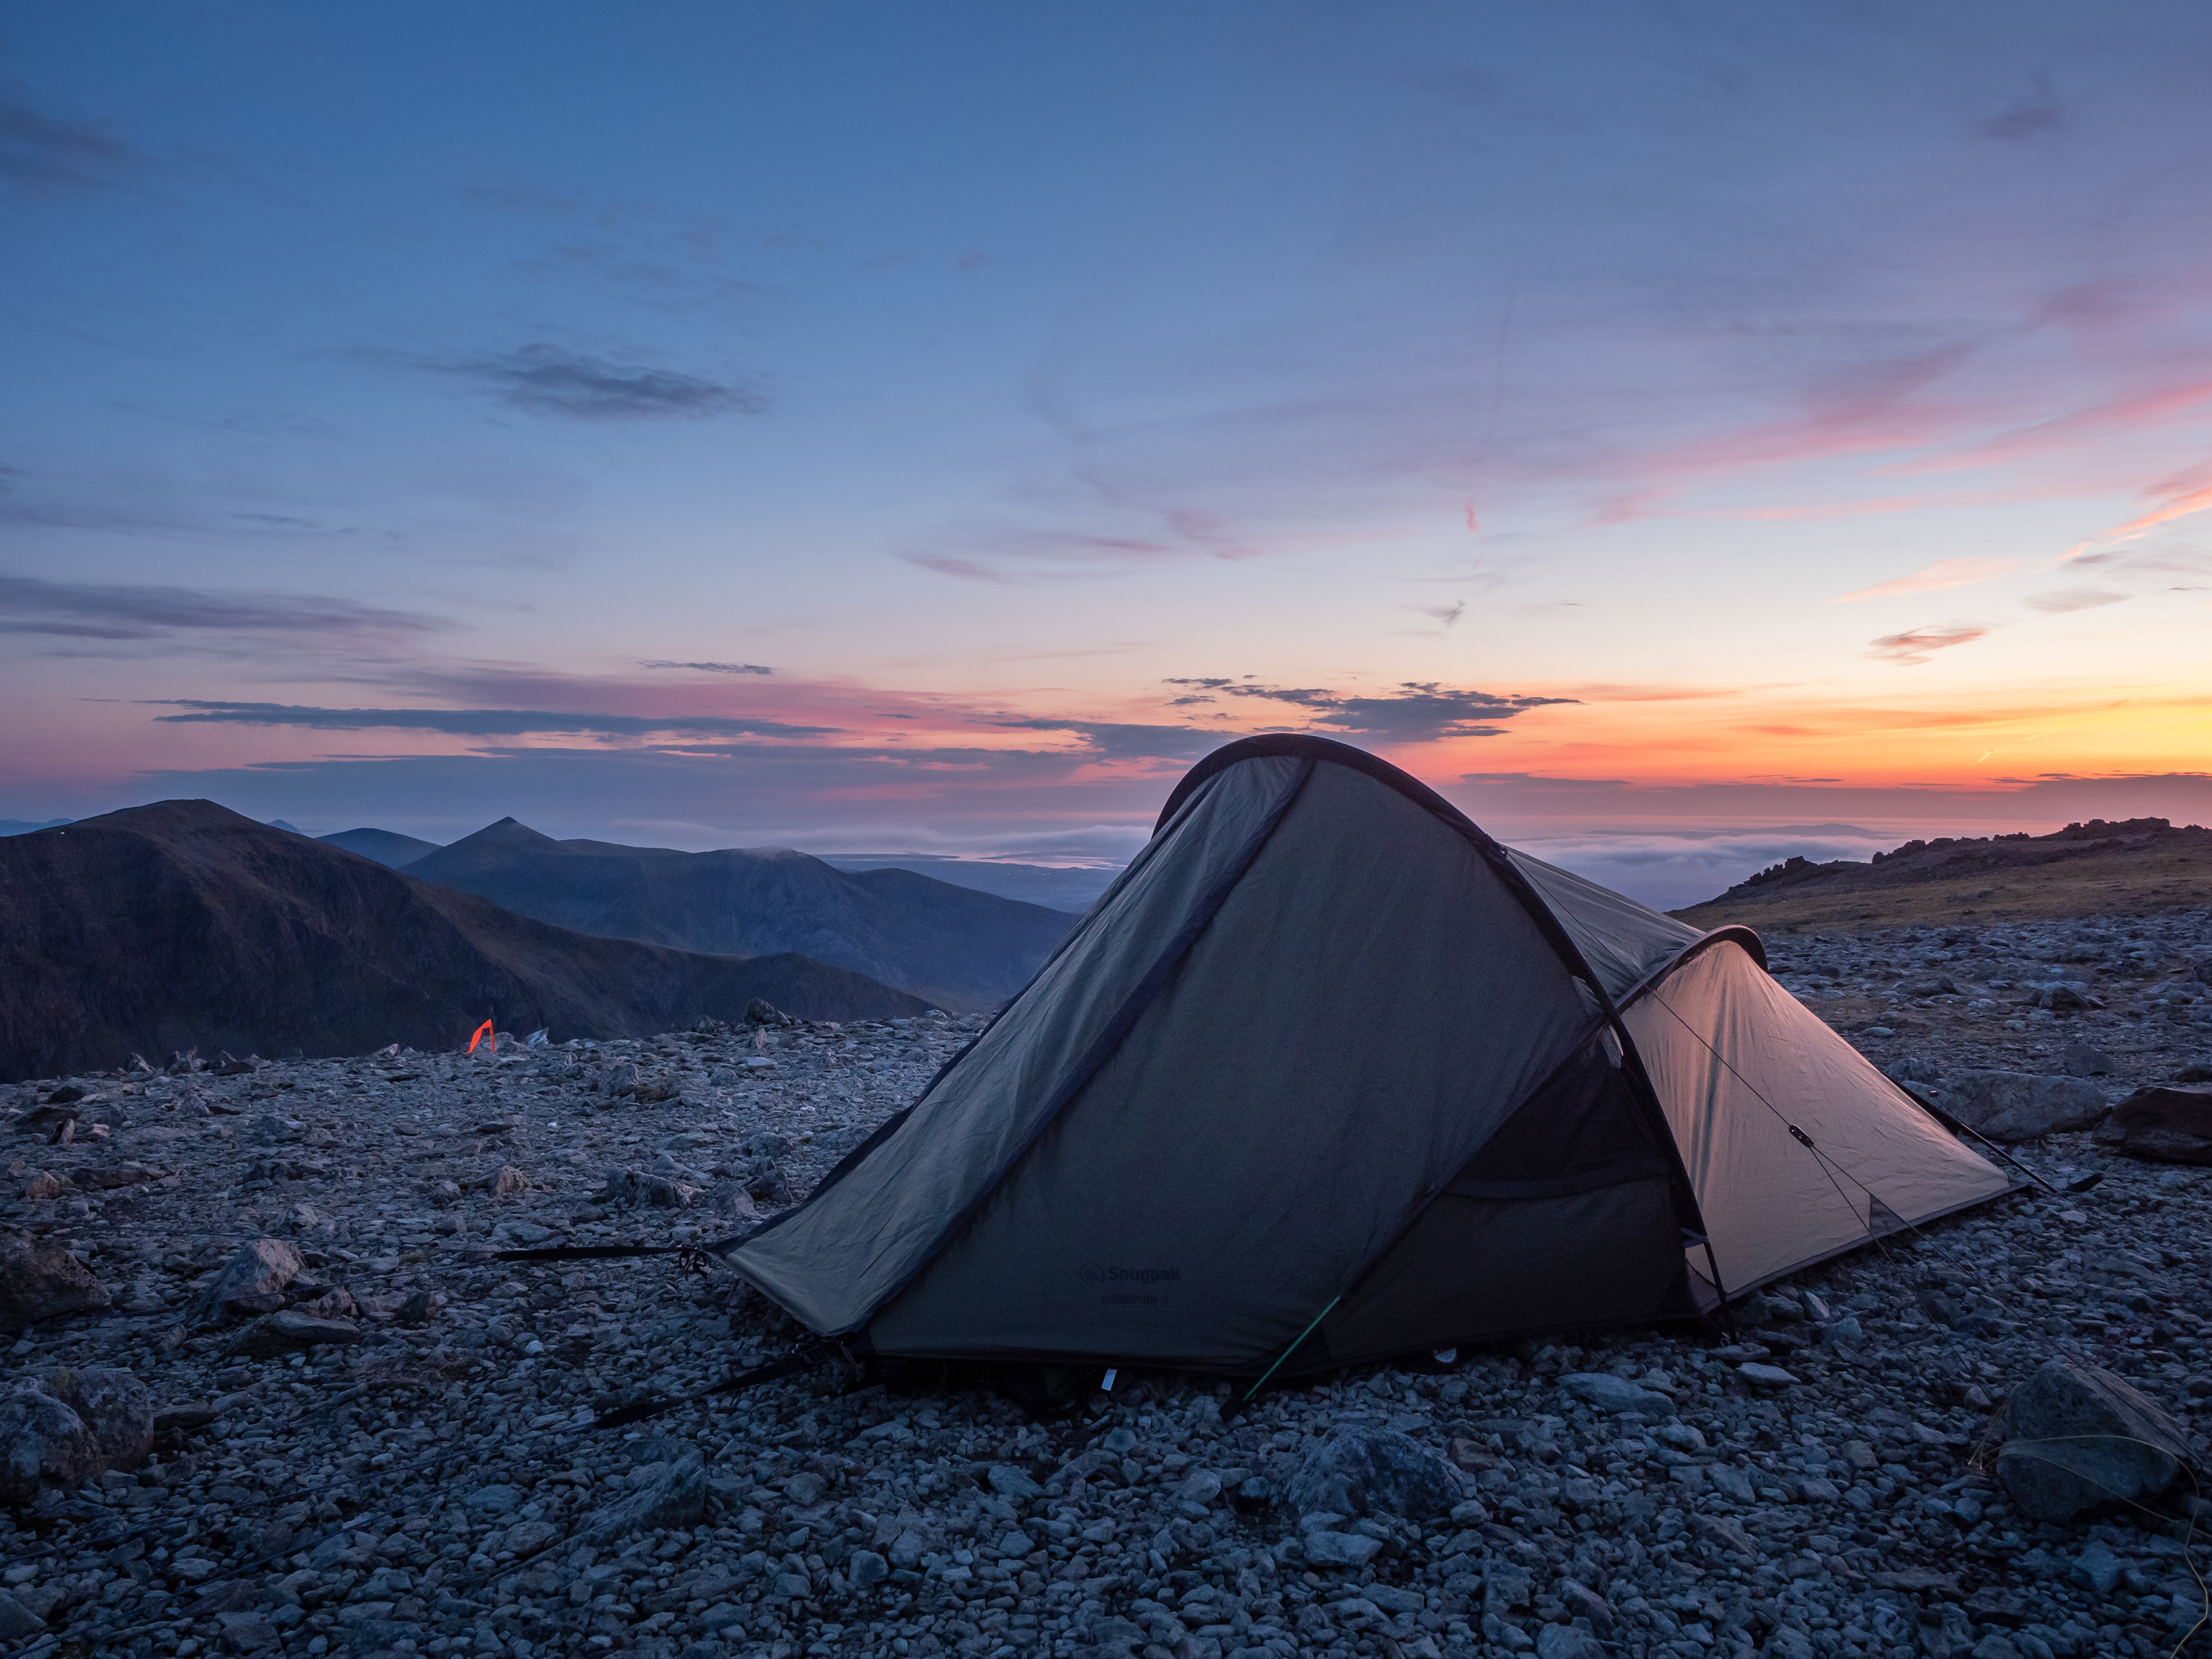
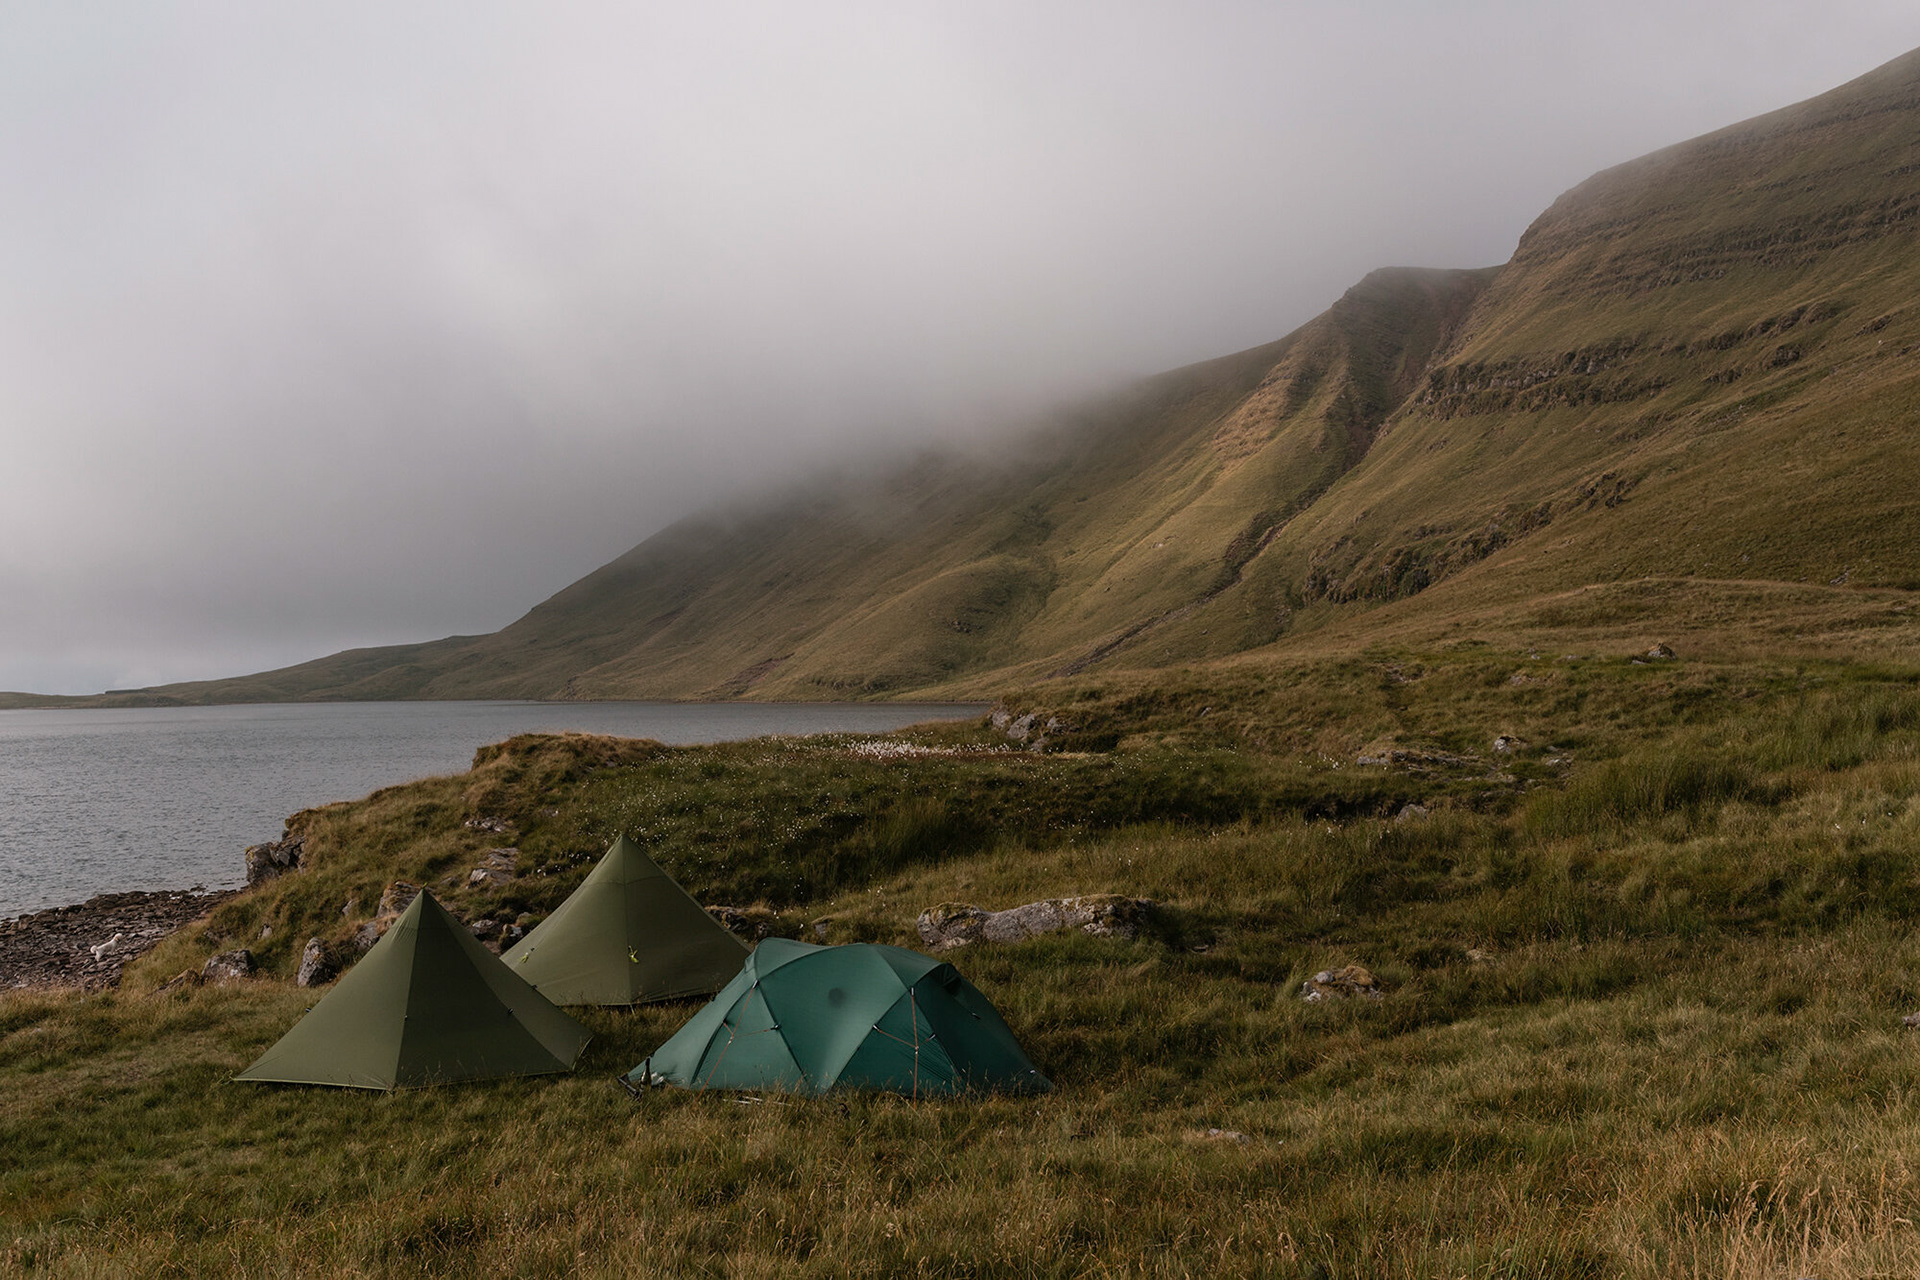
Tents, bivvy bags and camping options
Most individuals who adventure out camping will typically use a tent. This is often easier and offers the best protection and space for equipment. Most can be erected as one or are often built from the exterior first. Making them ideal in adverse weather conditions, typically found in winter.
Tents come in single or double-walled options. In the UK, I suggest a double-walled tent. This not only provides greater protection from the wet, which is vital here in the UK. They have more room and offer greater protection versus that of a single wall, which is prone to condensation and better suited to Alpine conditions.
Tarps are a little more creative, and if you’ve never used one before, I suggest practising first and finding a set-up that works for you.
Finally, bivvy bags and hooped bivvies. This is a required taste for sure. You are exposed to the elements, and all that is surrounding you is a waterproof bag. Great for tight spaces, caves, alpine, and climbers, or anywhere if you are feeling brave enough. The benefits of a bivvy bag are the weight. A bivvy bag is typically 200-500grams, and matched with an insulated sleeping bag and mat. Can be super quick to deploy and tucked down for the night. However, in wet weather, this is not fun, and a tarp is required to protect you.
There is another option, that being Hammocks, but this is an area I have had no experience in, as I’m often up mountains and in areas with no woodland.
I started as a tent guy, but over the years have enjoyed the exposure, freedom and lightweight packing of bivvy bags and tarps. It's a little more creative but great for a night out on the hills under the stars, and bikepacking and ultra-marathon events, where space and weight are limited. I can deploy the bag at a moment's notice and be sheltered from the wind, or pull up a tarp to shield me from the sun.
Alpkit Kloke Bivvy Bag = 280g
Alpkit Rig7 with pegs/guyrope = 700g
Alpkit Carbonlong twin poles x2 = 215g
Snugpak Scorpion II = 2,200g (4-season UK)
Sleeping system for wild camping - Sleeping bags and Mats
Sleeping bags and quilts
As someone who spends a great deal of my time wild camping in mountainous regions, I use one bag for most of the year. This is a 3/4 season sleeping bag. Why 3/4 season? Mountains are high, and even in the height of Summer at 1,000m above sea level, gusting winds and a clear night left frost on the tents. Yes, frost! Although it is 26°c at the foot of the mountain during the day, it certainly won’t be at the summit during the night, where I have seen temperatures plummet to -3ºc, so for this very reason, a 3/4 season sleeping bag is a must for these environments.
Sleeping bags come in two main fill types: Down or Synthetic. Down is often more expensive, generally lighter, and more compact than synthetic, but down bags are useless if they get wet. Recently, companies have begun using hydrophobic chemicals to counter this. Synthetic-filled bags are generally heavier and are also considered much tougher than the down equivalent bags. Neither is better than the other; both have their pros and cons.
Quilts are lighter than sleeping bags, as the back has no material or insulation. It is vital that you have an insulated mat below you. The idea of a quilt is that the back, which has been removed, would be wasted in a sleeping bag. As you crush the insulation, this doesn’t provide as much, if any, insulation. Quilts aren’t for everyone; however, sometimes climbing into a big sleeping bag is just what you need on a cold morning out camping.
Sleeping mats
Sleeping or camping mats aren’t just for comfort. A sleeping mat’s primary use is to stop the ground from absorbing the heat from your body. Did you know that lying down, you can lose some 65% of your body heat through the ground? So, a mat with a high R-value (4.0 plus) stops this and ultimately stops you from getting hyperthermia. Mats come in all sizes and types, from foam, down fill, fold up, self-inflate or running in the wind to fill…
Did you know, sleeping bag temperature ratings are tested using a sleeping mat with an R-value of 4.0 and the user in base layers. So, if you’re ever cold at night and using an expensive sleeping bag and a cheap mat, yet you’re still cold. It’s not the sleeping bag which is the problem.
Just to confuse things further, not every company who manufacture sleeping bags and mats use the R-value rating system, so use these as a guide only. No unanimous ruling has been applied in the outdoor industry when it comes to temperature rating equipment. Sorry!
A useful extra to pack for winter camps is a silver foil blanket or foam mat. Use this under your sleeping mat to reflect the cold away from you. It’s surprising how much of a difference this can have. If you are still cold, consider using a down mat with a foam core mat below. This will vastly improve the rating of both mats and provide extra protection and comfort for the inflated mat, as stacking the mats increases the R-value. 1st mat = 4.2 R + 2nd mat = 2 R giving a total = 6 R.
Therm-A-Rest Hyperion 32F/0C Down Sleeping Bag = 460g
Sea to Summit Thermolite Reg Reactor Liner = 248g
Therm-a-rest NeoAir XLite = 340g (R-value 4.2) UK 4-season
Cooking in the outdoors when hiking and camping
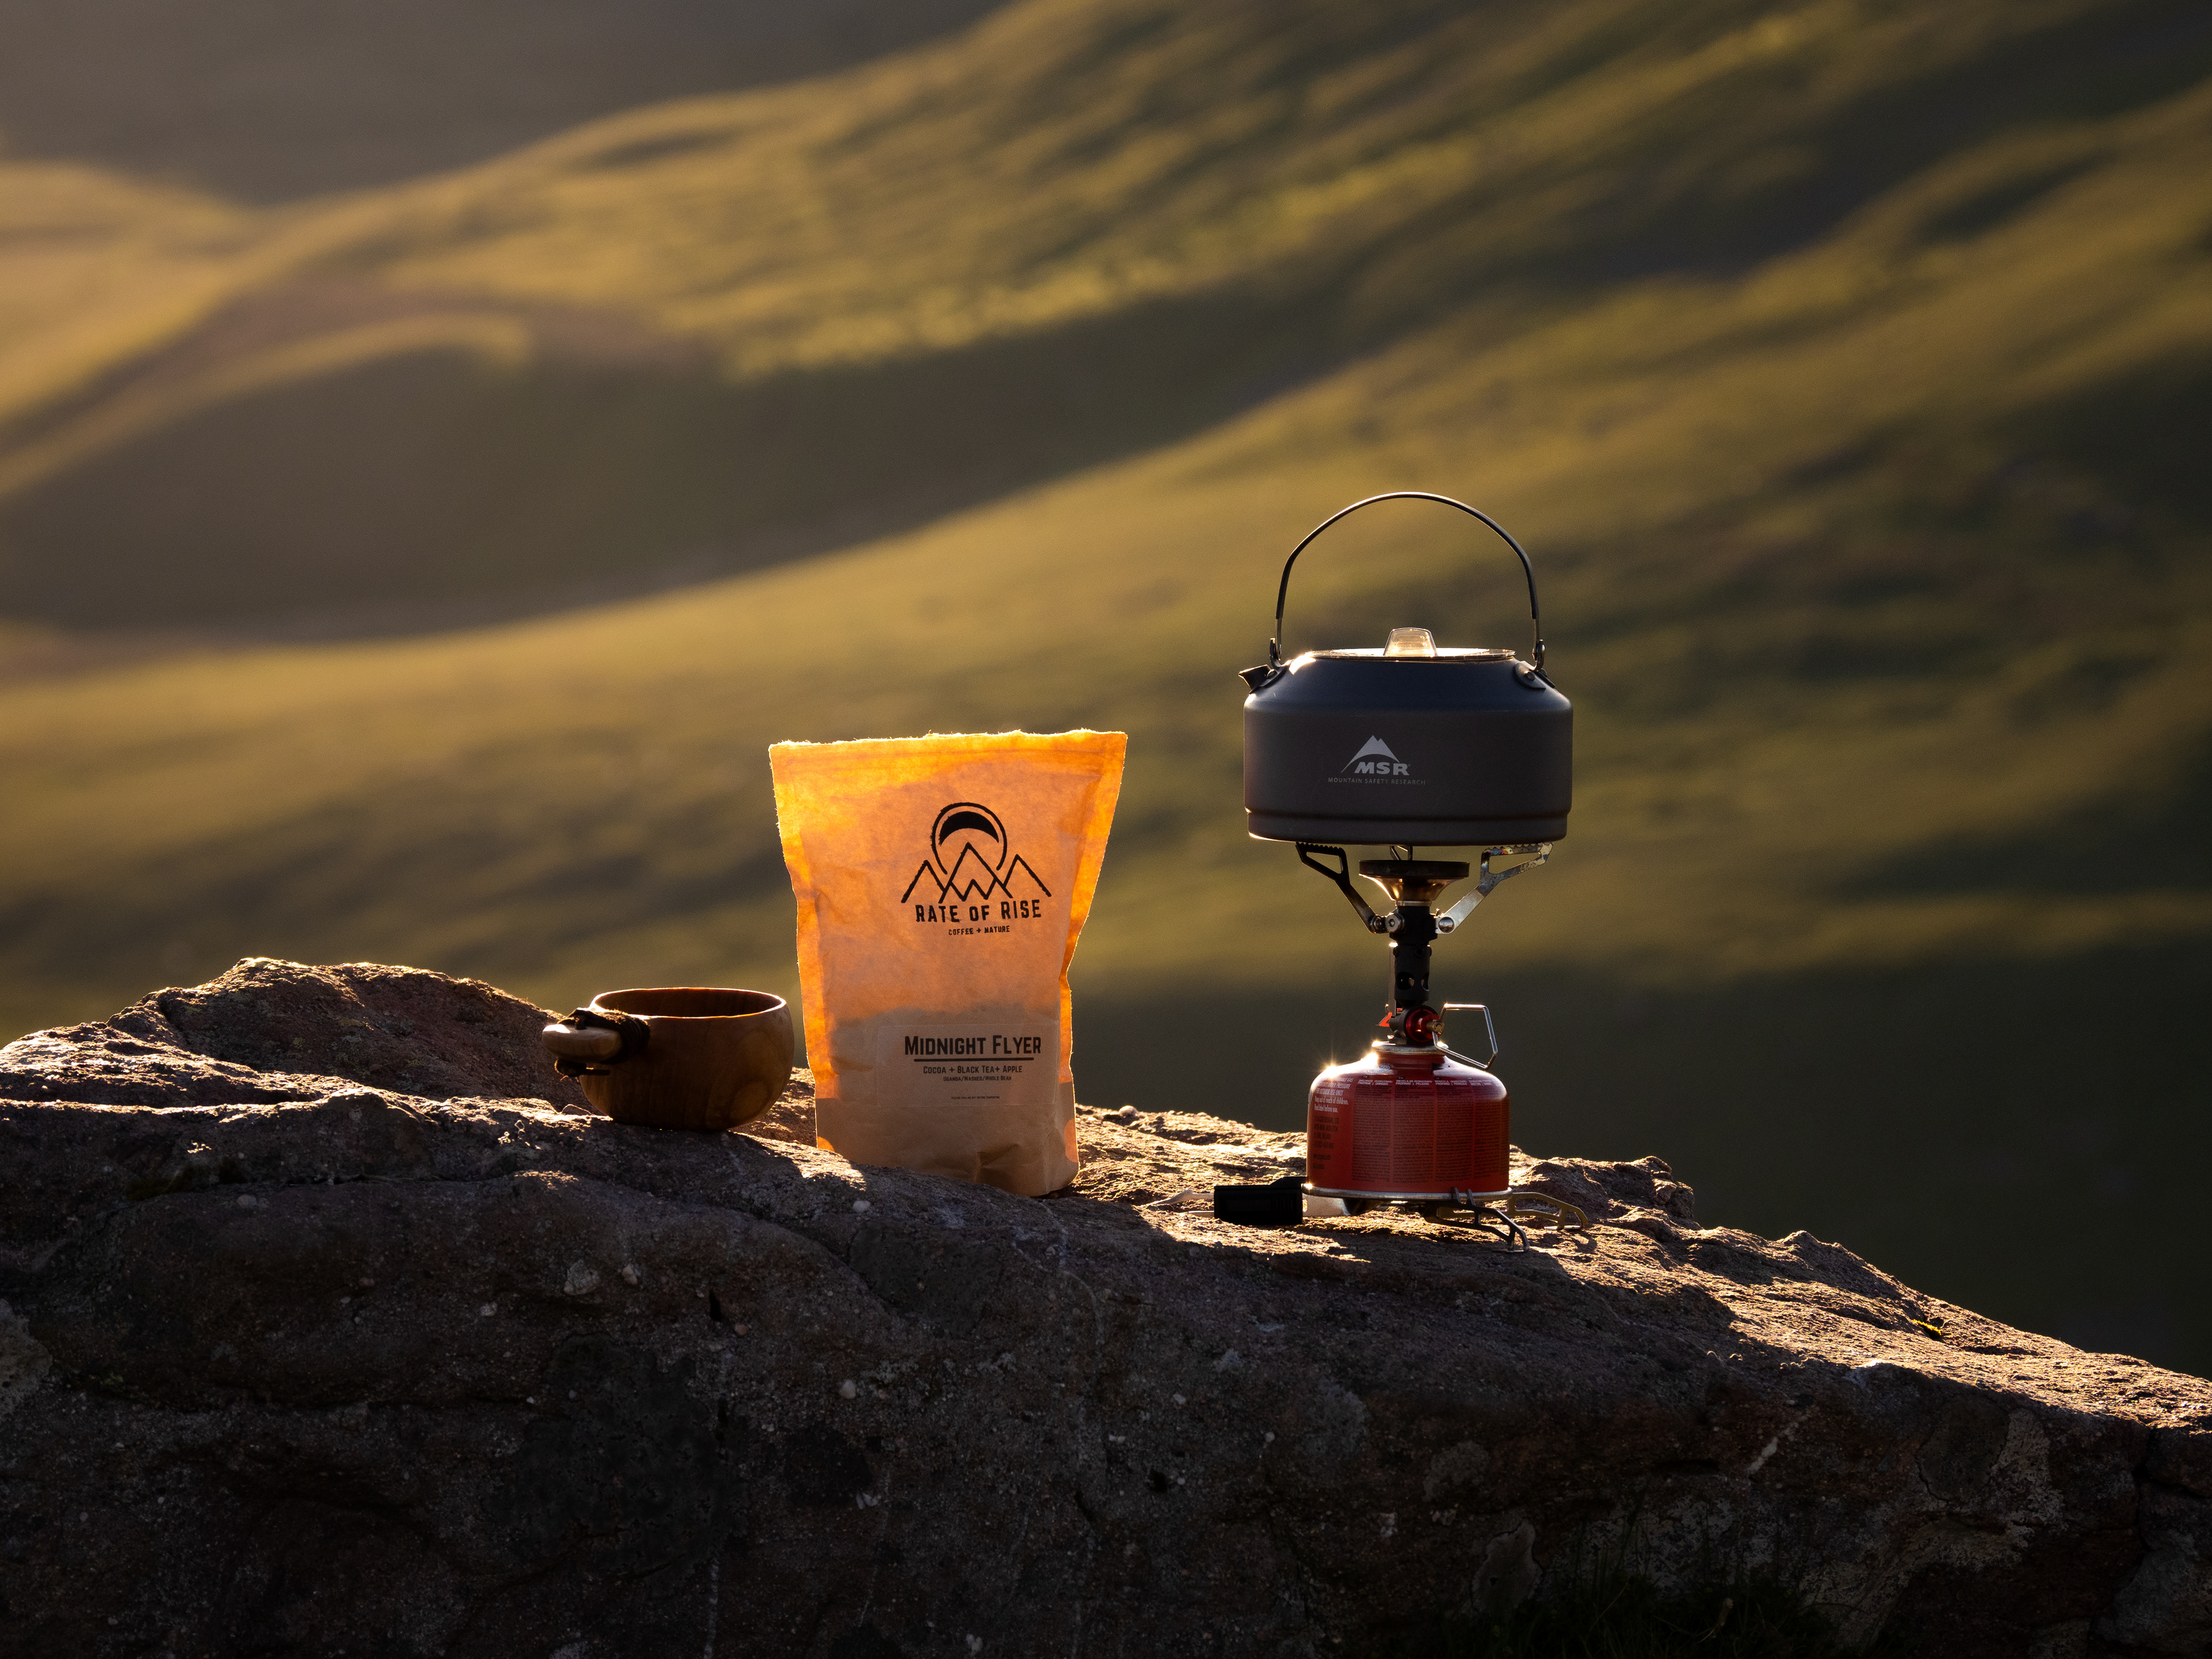
Camping stoves come in all varieties and sizes. If you’re a coffee connoisseur like me, this will dramatically impact the choice of stove.
I don’t use instant coffee and use beans and ground coffee, so I need filters and a press. I’ve used lots of stove varieties over the years, from the all-mighty and indestructible Trangia, in which I’ve seen a 20-year-old set, battered beyond belief and looked ready for the bin, yet was still working perfectly. Trangia stoves are heavy and bulky, but great for groups such as Duke of Edinburgh or Scouts expeditions, as they are larger and better suited for group cooking situations. There also pretty childproof and mountainproof, as I explained above. The Trangia can be adapted to use liquid fuel (Meths or gel) or gas.
Gas stoves are easier to use, faster and have greater temperature control. So long as you can find the gas canister to use the stove. If you’re travelling abroad, you cannot take the gas with you and sourcing the gas in the right canister can be impossible at times. Here, liquid bottles for fuel have the advantage. The MSR WhisperLite is a dual-fuel stove, so you can use gas or liquid, but stoves like this are heavier and more expensive.
For soloists, a complete system is often the preferred method. Some of my favourites I’ve used in the past have been: Alpkit Brukit, Coleman's Fyrestorm PCS or Jetboil Zip.
I don’t use matches anymore and never carry a lighter. Both can fail pretty easily, lighters need refilling or don’t work in the cold and wind. Matches, if they get wet or the strike pad gets crushed, they are impossible to use. Instead, I use a flint and steel. They can be used in winds, wet and have yet to fail on me. This is just used as a backup, should my stove's ignition switch not work.
On that note, don’t forget the gas!
Hydration when camping
When wild camping or hiking in remote areas, you are often restricted to how much you can carry, so plan to visit a water source or camp near one if you can. A vital tool for anyone serious about the outdoors and camping is a water filter. I previously used a Sawyer Mini Water filter or an MSR Trailshot; I now use a Water To Go bottle with water filters inside. These filter options allow the user to drink straight from lakes or rivers with no worries of dirt, pollution or any nasties in the water. However, more recently, I have stopped using filters altogether, given the UK waterways and pollution. I will just visit a shop on the route.
If you are stuck and don’t have one of these filter systems, you can also boil up the water from a water source. Two issues you have with boiling the water directly from the water source are having to wait for it to cool down, and you have to be wary of any pond life, plants and debris getting into the water. Another option is using chlorine tablets, but these can make the water taste odd, and after five days on expedition, you’ll be wishing for fresh spring water and cold water running from a tap! So, for all intents and purposes. Just buy a water filter. Less fuss and tastes nicer.
I must add, it has to be running/moving water. i.e. from a lake or river. Not puddles or any water near farms or livestock.
Cooking Set up:
MSR Pocket Rocket Deluxe = 80g
MSR Titan Cup 450ml = 68g
MSR ISO pro gas 110 = 140g
MSR Strike Lighter = 35g
MSR cutlery = 20g
True Utility Bare Knife = 16g
MSR Pocket Rocket Deluxe = 80g
MSR Titan Cup 450ml = 68g
MSR ISO pro gas 110 = 140g
MSR Strike Lighter = 35g
MSR cutlery = 20g
True Utility Bare Knife = 16g
Water:
Camelbak Krux 2L = 210g
Water To Go Active Bottle 75cl (Water Filter) = 140g
Camelbak Krux 2L = 210g
Water To Go Active Bottle 75cl (Water Filter) = 140g
Coffee Set up:
Aeropress Go = 300g
Rhino Tall Hand Grinder = 350g
Aeropress Go = 300g
Rhino Tall Hand Grinder = 350g
Food for hiking and wild camping
Never skimp out on food, if you’re out in the mountains climbing all day or walking 12 plus miles you will burn a lot of calories and you need the energy. It’s important all year round, especially in Winter! Warm food before bed can make a huge difference to your wellbeing and comfort.
I know someone who only took Cup-a-Soups and a handful of chocolate bars on expedition, and already by day two, they had to get emergency food and were taken to a shop because they had made themselves ill. Yes, they were deferred for this during their Duke of Edinburgh expedition. Another only bought canned food, and stupidly didn’t bring a can opener either. Essentially, plan your meals and what you will be eating. Aim to get your full 2,000 – 3,000 calories a day if hiking. For some, it can be more.
My choice of food is dehydrated food packs, where you just add water. They're lighter, and if the packaging does burst, it's only the dried contents inside your bag, not wet. Each pack typically weighs 100-150g and comes in a range of 500-1,000 calorie packs. They're not the cheapest, but a big 1,000-calorie meal can be rehydrated and count as two meals if on shorter hikes, or where the full meal is required, it will make a world of difference.
Snacks - Cereal bars, cocktail sausages, pork pies, chorizo, tuna meals, flapjacks, nuts, fruit bars, graze mixes, you want high calories and nutritional packs full of protein, fat and carbs. Gummy bears and Haribo are also great to store in your pocket for on the go. A little sugar goes a long way when you’re tired on a hike, but do complement this with water and fatty foods to help build your energy back.
I typically keep a bunch of bananas, apples or fruit in the boot of my car when out, so if returning to the car, I can have fresh fruit. I can also dump and leave rubbish in my car. Please don’t leave your apple cores or banana skins on roadsides or in the hills. If you hadn’t noticed the lack of abundance in apple and banana trees in the mountainous regions.
On Yr Wyddfa (Snowdon), for example, it takes 3 years for a banana skin to decompose, by which point livestock and wildlife will have eaten it and become ill or cause fatalities.
On Yr Wyddfa (Snowdon), for example, it takes 3 years for a banana skin to decompose, by which point livestock and wildlife will have eaten it and become ill or cause fatalities.
Leave No Trace. Think Nature First.
First-aid kit & accessories
You should always have one packed, but I don’t mean the red bags you get from hiking stores. I was taught by another Expedition leader to pack the essentials and make a personal first-aid kit. It’s still in a bright red pack, stored at the top of my pack. Inside there are plasters, vet wrap, bandages, shears, blister plasters, sterile wipes, multi-tool, USB cable, foil blanket/vapour bag, tick remover, bite cream, tissues, pain killers, duct tape, batteries, plus a few snacks for emergencies.
Always pack a pocket-sized sun cream and bug spray. Firstly, the sun’s harmful UV rays aren’t just around for Summer; they can affect us all year round, even in the depths of winter. Bug spray is useful all year round, too. The UK is wet, and in low, sheltered valleys, especially near water, the little pests can still be seen. Smidge sell a credit card-sized bottle which slips inside a first-aid kit. Perfect for any occasion.
Cap = 60g
Polarised Sun glasses = 50g
Beanie hat = 65g
Buff = 30g
Montane Prism Liner Gloves = 18g (All year)
Montane Prism Gloves = 55g (All year)
Black Diamond Dirt Bag leather gloves = 150g (Waterproof/Winter rated to -10ºc)
Smidge Insect repellent wipes & Smidge bug net = 100g
The Tentlab Deuce UL Trowl & Biodegradable toilet paper = 50g
Ledlenser MH11 headtorch (1,000 lumens) = 179g
Suunto Vertical 2 GPS water = 74g
Moorswood + Home of Millican Limited Edition Ramblers Roll = 60g
Navigation - Digital and paper map & compass
Google Maps isn’t enough to get you by in the mountains. For one, there is little to no signal, and operating Maps on your phone requires a lot of battery power. If it’s cold outside, your phone will lose power even quicker. You often read horror stories where the user had 40%, then the phone died in an instance.
Always pack a map and compass regardless. They’re small, light, and there is no excuse not to pack one. By all means, use a phone or GPS as additional aid, but paper never runs out of batteries. They also make useful seats on wet benches.
On that note, it’s worth spending a little extra to get a waterproof map, or buying a waterproof map case will help make your maps last longer. Another great option is Splashmaps, which are fabric, which means they are more compact, light and waterproof. They also make great toobs or hats, should you need one.
If you’re going to use a phone for GPS and navigation in the outdoors, use an actual navigation app like OS Maps, Outdoor Active, Komoot or Maps.Me. As you can download areas, which means you don’t need data or be connected. They run on GPS only, which means your phone will last a little longer. It’s also worthwhile packing a power bank to get extra juice when you need it.
I personally use OS Maps with a Premium Subscription. As the maker of Ordnance Survey maps, OS Maps is the original and offers a 3D view, fly through and advanced plotting, and now offers Satellite View or, under the subscription plan, gives you access to the UK Ordnance Survey mapping. This makes it great for hiking, mountaineering, cycling, skiing and winter sports, giving you advanced planning at the click of a mouse.
Clothing for hiking, camping and mountaineering
Base layers, mid layers, outer layers, and trousers
The multi-layer system – Baselayer next to the skin, midlayer for warmth, an insulated jacket for further warmth, or as an outer layer with some weather protection, and finally the waterproof jacket as the complete package.
Of course, all come in a variety of insulation and qualities. Some of my midlayers and jackets are weatherproof and suitable for short showers, or offer further protection from the wind.
With baselayers, it’s worth looking for fast-drying, wicking tops; these are better suited for activities such as hiking in various conditions, reducing sweat, and keeping you comfortable after long wear. Your normal T-Shirts found in most high street stores are polyester; these are not quick drying, and absorb sweat, which can cause further rubbing and rashes.
Mid-layers, such as a fleece, make great pillows if you are looking to save weight and reduce pack size by not carrying a camping pillow.
I use synthetic-filled insulated jackets. Being based in the UK, where the climate and conditions are damp. Synthetic works better in these conditions. Down is fantastic, lightweight and compact, but when wet it is virtually useless, and can become damaged if you continue to put the down insulation through these conditions. Even the treated insulation!
Tshirts/base layer
Montane Dart base layers = 135g
Fjallraven Abisko Wool LS base layers = 160g
Fleeces/Mid-layer tops
Montane Proteium Fleece Hoodie = 390g
Paramo Velez Grid = 200g
Paramo Enduro Plus Fleece = 435g (windproof)
Outer layers/jackets
Mountain Equipment Switch Pro Jacket = 340g (windproof)
Trousers and Shorts
The layering system isn’t just for the top half, I use a variety of trousers or tights for different seasons and conditions in the year. In warmer months, running and cycling Trail tights are perfect but I always pack a pair of quick drying hiking trousers for backup. In colder months thicker hiking or snow trousers such as the Rab Vapour Rise Guide trousers are perfect as they have fleece lining to keep you warm but a tough, water repellent exterior to provide protection from the elements and outdoors. If you get really cold I suggest layering up below these Winter trousers with another pair of Trail tights or fleeced trekking tights.
Something else to consider is packing is over-trousers / waterproof trousers for longer expeditions and severe weather. I suggest getting zipper or buttoned over-trousers so you won’t have to remove your boots in order to put them on. I will pack these regardless the time of year.
Passenger Clothing Board Shorts = 150g (Summer/Weatherproof)
Paramo Enduro Trek = 492g (All year/Weatherproof)
Fjallraven Vidda Pro Trousers = 590g (All year/Weatherproof)
Waterproof clothing
You should always pack a waterproof jacket, no matter the time of year. You should look for not only a waterproof jacket but also breathable, which stops you from getting damp inside.
There is a key difference between “Waterproof” and “Weatherproof” - Waterproof is, as the name suggests, it is waterproof and can withstand rain and wind for long durations, often with higher ratings such as 15,000mm/ 10,000mvp. Weatherproof isn’t to the same level of protection; it can withstand a short shower, and many offer some degree of warmth and wind protection, but shouldn’t be used in heavy rain for long periods. They will eventually fail, and you will get wet and cold.
In colder months, you will need something more robust and warmer. Go for a helmet compatible if you plan on climbing and cycling. One with a stiffened peak, adjustable cuffs, hoods and hemlines all help with the fit and keep you better protected. Waterproof zippers will help, but all zips leak, so don’t put any expensive items like mobile phones in external pockets, especially in winter. Keep your electronics stored in the midlayer to stop the battery from being zapped.
There is a few varieties of waterproof jackets too. Soft shell, Hard shell and Directional fabrics.
Soft shells, which are typically weatherproof and only suitable for light showers or snow. Use these for when trail running and sticking to local trails, and they are often popular for snow alpine routes and skiing or as a midlayer when conditions are bad. This is because they are more breathable and allow sweat and moisture out, while providing a water-resistant layer and warmth.
Hard shell jackets are waterproof; they come in two varieties of fabric - Gore-Tex or Pertex. Constructed of 2, 2.5 and 3-layer fabrics.
The outer (face) fabric or exterior shell provides the durability and abrasion resistance and acts as the first line of defence against rain. This layer is treated with a durable water repellent (DWR) coating, forcing water to bead up and roll off.
The second layer or middle core allows water vapour (sweat) to escape while keeping liquid water out. Common materials include ePTFE (like Gore-Tex) or Polyurethane (PU).
A third layer protects the fragile membrane from your body's natural oils, sweat, and friction. Depending on the jacket type, this is either a loose-hanging liner or a fused backing.
Directional fabrics, such as the Paramo Clothing Nikwax fabrics, act like an animal's fur and body, moving the water out. Trapping water in the outer layer, with the internal layer pushing the moisture out, clever stuff, eh! This is perhaps the most expensive of the three styles and also requires the most work, with regular reproofing and keeping clean. Hard shells for this reason are typically the ‘best’ and less fuss, but many Mountain and Outdoor leaders like myself opt for Paramo Clothing because of the breathability and ability to open up the jacket whilst providing maximum protection from the elements.
Now the outdoor industry is moving away from PFAs, or forever chemicals, which are used to treat waterproof clothing. Now hard shell jackets will require regular reproofing as the jackets themselves and the reproofers from Nikwax and Grangers are water-based. So, they are not as 'good' as proofing pre 2020, but they do not destroy the environment.
Montane Minimus Lite Jacket = 137g (All Year - trail running) (hydrostatic head = 20,000mm)
Mountain Equipment MRT Kongur Jacket = 670g (All Year) (hydrostatic head = 28,000mm)
Paramo Velez Windproof = 190g (All Year) (windproof)
Paramo Enduro Trek Windproof jacket = 350g (All Year) (windproof)
Paramo Velez Evolution Hybrid Smock = 720g (All Year) (waterproof/windproof)
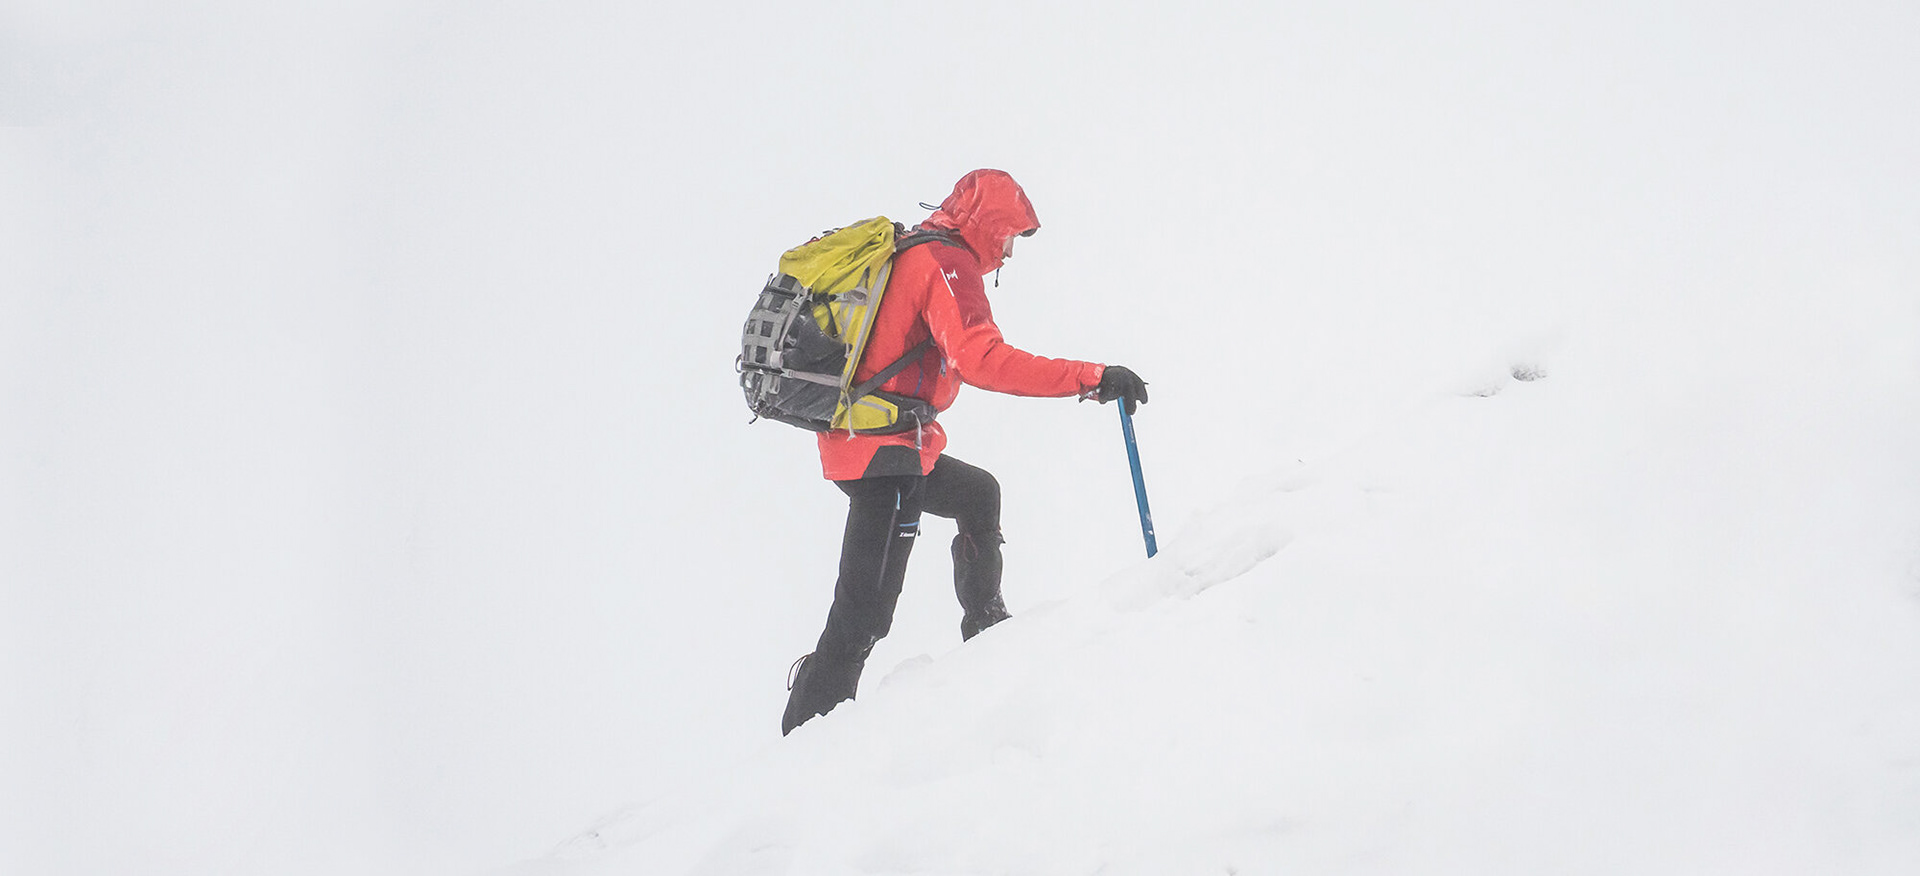
Winter Equipment
So, you may have heard the term “Full Winter kit required”. That doesn’t just mean gloves, scarves, hats, and thick jumpers. The term also refers to extra equipment which is a must in winter, certainly in the mountains. These extra items are crampons, ice axes and hard hats. Generally, if you need the crampons, you need the axe too.
Crampons don’t fit all boots, and you have to look for a ‘mountain boot’ which is listed as B1, B2 or B3 rating, which matches the crampon ratings: C1, C2 and C3. C1 is for general hill walking and low-level. Good for entry-level winter walking. C2 is for more technical ridges and starting to climb, C3 is for complex and technical climbs. If you don’t know how to use any of this kit, it is highly recommended to book onto a Winter Skills course, whereby you can learn how to walk with and use crampons, how to use an Ice axe, self-arrest and climbing and working in the snow/ice.
BMC have an excellent resource online for learning and understanding more about winter hill walking. Watch their YouTube Series for more.
Crampons come in a range of scales and how they are clipped on. With plastic bails or heel welts, which require a rigid boot with a heel step on the front and/or rear. Crampons also have a varying number of points (The spikes) ranging from 10 to 14, depending on the technicalities you need. The more spikes, the more technical and the more specialist a boot you require. i.e., Grivel G1 crampons are C1 rated with 10 points and typically with plastic bails. Grivel G14 is a C3-rated crampon and for ice climping, typically seen with front and back heel welts.
Along with a good pair of mountain boots, which are crampon compatible, you will need several other items to help keep you upright and keep you safe in the poor conditions. Generally, if you need your crampons, you will need an ice axe. This is used to help you support when walking up hill in zigzags in the snow. Used for a self-arrest, whereby you stop yourself from sliding down the ice/snow on a sharp edge.
With the risk of slipping far greater, you need to think about protecting your head, so a climbing helmet or mountaineering helmet is advised in particularly poor conditions.
Ski goggles or eye protection. In winter, the weather worsens and obviously gets colder and exposed on the mountain tops or even lower valleys, wind and gusts can pick up snow and ice and make visibility difficult. It goes without saying as well. A good pair of thick, waterproof gloves is a must!
Simond Naja Light Mountaineering Ice Axe = 460g
Simond Mountaineering helmet = 180g
Ski/Snow goggles for poor conditions = 60g
Hot hands warmers = 80g
(Keeping your hands/gloves snug or useful for keeping batteries and phone warm in cold weather)
(Keeping your hands/gloves snug or useful for keeping batteries and phone warm in cold weather)
Another thing to remember is navigation! I pack two maps in winter, an OS map or Splash Maps inside the pack and a smaller laminated cross-section in my jacket, as well as the compass tied to a zipper for quick access. I never use my phone in snow/sub-zero conditions for navigation. The cold will sap the battery almost instantly, so this is stored inside a dry bag, easy to access inside my rucksack.
Footwear for hiking and mountaineering
When it comes to footwear, you need to try before you hit the hills.
For example, Salomons are a popular brand of boots, but I personally do not get on with them as I find them too narrow. Further to which, don’t cheap out either! Your feet have to take your weight, rucksack and the impact of whatever the ground has in store for you - Ice, bogs, slate, rocky terrain… The list goes on. Investing in a good pair of hiking boots will keep you going for longer, and the footwear will likely last a lot longer as better materials are used.
Not only will you need a good pair of boots, but a good pair of socks! A good pair of socks will stop blisters and reduce sweat and smells from hiking. A good midweight pair of merino wool socks is perfect for hiking, and during Summer, a lighter trail sock is perfect when you will be in shorts or low ankle boots/shoes. In Winter, sock liners or thick snow socks are best to keep your feet warm and dry.
Another set of socks I highly suggest everyone invest in are waterproof socks! Yes, they are a thing and are the best things created since sliced bread. I use Sealskinz waterproof socks and always keep a set in my rucksack all year. Waterproof boots have one design flaw, as such... the hole your foot goes in. So, if you begin wading into a river and it’s higher than your boots. Your waterproof socks will do the work in keeping your feet dry. BUT, I don't recommend them in summer. It is simply too hot, and your feet will swell and rub. This is why I actually use trail running shoes in summer with a waterproof sock as backup.
Finally, in very wet conditions, bogs and high grass, a pair of gaiters will go a long way; they help reduce dirt and water ruining your trousers, further protect your boots and ankles and help a great deal in boggy environments and the snow. Some mountain boots and trousers have built-in gaiters to help.
Below is a list of my footwear I am currently using; however, some of my favourites from the past have been: Berghaus Hillmaster II boots, Anatom multi activity shoes, On Cloud Cloudrock boots, Saucony Excursion shoes, Aku Trekker Pro boots, Mammut Trovat boots, Mammut Ducan shoes and Altra Shoes.
Shoes are a very personal thing. I use zero-toe to heel drop shoes from Altra and have previously been a barefoot shoe wearer, but have opted more recently (post ITB injuries) to wear shoes which are zero drop but with a bit of padding. This is where I found Altra's to be really good for me, as they have a wide toe box and zero drop toe to heel, but with a decent midsole for cushioning.
Mammut Trovat Guide II High GTX = 1,600g
Altra Olympus 6 = 600g (trail running)
Altra FWD VIA2 = 600g (road running)
Bridgedale and Smartwool Hiking Merino socks
Bridgedale Liner socks
Sealskinz Waterproof socks and Dexshell Mudder compression knee-high socks
Injini Toe liner socks and Smartwool running socks
Mountain Equipment Gaiters = 200g (Wet weather/Rough terrain)